Important:
If you make changes to your book, click Save and Close on the right of the toolbar to save your work to the Cloud.
You will see the toolbar when you open a Classroom Presentation Tool. The toolbar is usually at the top of the screen. It looks like this:
 Go to page
Want to go straight to a unit or section of your book? Click the Go to page icon, scroll to the unit or section, and click the page you want to go to. Click the Go to page icon again to close it.
 Search & dictionary
To search your book, click the Search icon and type a word or phrase. You can search:
•Book: The search will look anywhere in the book. Click a search result to go to that page.
•Note: The search will look in text notes you've added to the book. Click a search result to go to that page.
•Dictionary: The search will look for a word or phrase in the Oxford Dictionary used for your language level. See Using the dictionary for more information.
Click the Search icon again to close the search.
 Zoom in
To increase the size of the page on-screen, click the Zoom in icon.
 Zoom out
To decrease the size of the page on-screen, click the Zoom out icon.
 Focus
Focus
Note:
Focus is not available in all books. If this option is greyed out, this means that the option cannot be used with your book. You can still complete exercises as normal.
Pen and highlighter options are now available in Focus mode. Pen and highlighter marks will not be saved when you close Focus mode.
Use Focus to open an exercise full-screen to make it easier to answer in class. When you click the Focus icon in the toolbar, exercises which can be viewed full-screen will show a dotted blue border. Click an exercise to expand it.
When an exercise is expanded, you will have access to all of the Marking options at the top of the window. You can also Draw & Highlight.
Select Zoom in to increase the size of the exercise on screen. You can zoom in twice.
To delete your answers, click Delete Answers at the top of the window. This will not delete your pen and highlighter marks.
To close an exercise, click the cross in the right corner of the exercise window or click anywhere outside of the exercise box. Answers you've entered will be shown on the page.
 Draw & Highlight
Using the pens
To use the pens, click the Pens icon, then click on the colour you'd like to use from the options, as shown below:

The pen opens at the smallest size. You can also choose the size of the pen marks by clicking the + or - icons on the left.
When you have chosen your pen, click and drag your mouse to make pen marks.
You can use pen marks to cover text and images.
When you're finished, click the Pens icon on the toolbar to close the pen options.
Deleting pen marks
To delete pen marks, click the Eraser in the Pens options, then select a mark to delete it. Select the Eraser again when you’re finished deleting marks.
To delete all of the pen marks for the page(s) you are on, click on the Delete icon on the Pens options and then click OK.
Highlighters
Using the highlighter
To use the highlighter click on the colour you would like to use from the options, as shown below:

You can also choose the size of the highlighter marks by clicking the + or - icons on the left. The dot in the middle of these options shows the current highlighter size.
When you have chosen your highlighter, click and drag your mouse to make highlighter marks.
When you're finished, click the Highlighters icon on the toolbar to close the highlighter options.
Deleting highlighter marks
To delete highlighter marks, click the Eraser in the Highlighters options, then select a mark to delete it. Select the Eraser again when you’re finished deleting marks.
To delete all of the highlighter marks for the page(s) you are on, click on the Delete icon on the Highlighters options and then click OK.
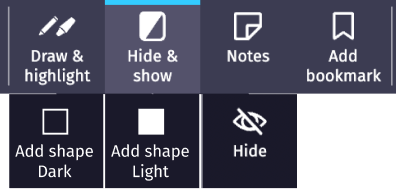
Hide & show
Hide any part of the page with a simple shape using the Hide & show tool.
Add shapes to a page before a lesson and use them for different lessons.
Add a shape
Go to the toolbar and choose Hide & show. Select Add shape Dark or Add shape Light.
Your cursor changes to a cross. Click and drag your cursor to draw a shape.
When you finish, you can change the size of the shape, or move the whole shape to a new place on the page.
You can only draw a rectangular shape with this tool.
Copy and paste a shape
You can also copy and paste a shape. To do this:
1.Right-click the shape and choose Copy.
2.Right-click the page and choose Paste.
On a PC, you can also use the keyboard shortcuts Ctrl+C and Ctrl+V.
On a Mac, use the keyboard shortcuts Command-C and Command-V.
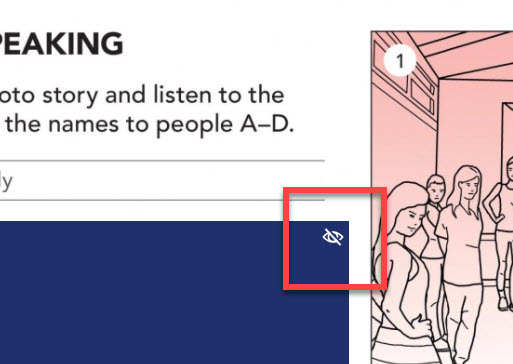
Hide a shape
To hide the shape, select the shape and use the eye icon.
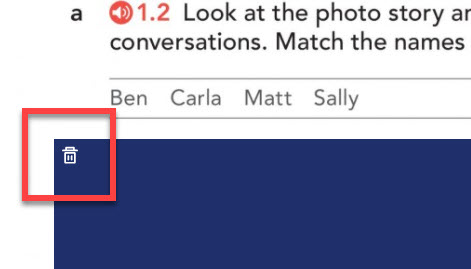
Delete a shape
To delete the shape, select the shape and use the bin icon.
Hide and show all shapes on a page
You can add 2 or more shapes to a page.
•To show all the shapes on a page: go to the toolbar and choose Hide & show > Show. All the shapes on the page will show.
•To hide all the shapes on a page: go to the toolbar and choose Hide & show > Hide. All the shapes on the page will show.
You can add shapes in 2-page view but you cannot put a shape across two pages.
 Notes
Notes
You can add two types of notes:
 Audio notes
To add an audio note in one-page view:
1.Click the Notes icon, then click the Audio (microphone) icon.
2.If the website asks for permission to access your microphone, click OK or Allow.
3.Click the Record icon on the audio bar.
4.Record your voice.
5.Click Record again to stop recording.
6.Click Play to listen to your note. If you would like to, you can re-record your note by clicking Record again.
7.When you're finished recording, click Save. Your audio note will be saved to the Cloud.
To delete an audio note:
1.Click the Audio note icon in your book.
2.On the audio bar, click the Delete icon.
3.Click OK on the message that appears. The note will be deleted.
Currently, users can leave up to 50 audio notes per book. If they delete notes within a book, they can surely leave additional notes.
 Text notes
You can now make it easier for students to see the contents of your notes by zooming in. Just zoom in on the page and your notes will get bigger too, making them easier to read. This means you can add more examples, explanations, and links to your notes knowing your students will be able to see them clearly.
To add a text note in one-page view:
1.Click the Notes icon, then click the Text icon.
2.Type your note into the box. You can include a website link if you want to by starting the link with "www.".
3.Click a colour for your note.
4.Click Done to save your note.
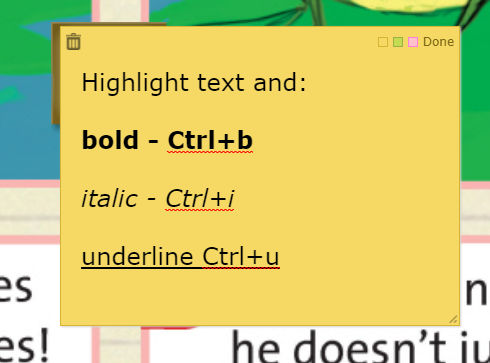
Tip
You can make text bold, italic, or underlined.
On a PC, use the keyboard shortcuts CTRL+B, CTRL+I, and CTRL+U.
On a Mac, use the keyboard shortcuts Command-B, Command-I, and Command-U.
You can also add an text note in two-page view. To do this, right-click with your mouse on the page and then click the Text icon.
To delete a text note:
1.Click the Text note icon in your book.
2.Click the Delete icon.
3.Click OK on the message that appears. The note will be deleted.
 Add bookmark
To add a bookmark:
1.Click the Bookmark icon in the toolbar.
2.Go to the page you want to bookmark.
3.Click the Bookmark icon in the top right corner of the page.
4.Click the Bookmark icon in the toolbar again to close it.
To remove a bookmark, click the bookmark icon on the page.
Marking options
Some books include interactive exercises. See Using interactive content for more information on answering exercises.
There are three marking options available in the toolbar:
•Check answers
•Show answers (not available for coursebooks)
•Clear answers
These options can only be used when an exercise has been completed.
 Check answers
To mark your completed exercises click the Check answers icon. Your answers will be marked with a tick (correct) or a cross (incorrect).
Note:
You don't need to complete all of the exercises on a page to check answers.
 Clear page
You can clear all the notes, highlights and pen marks in your current view with this icon. Only the notes in your current view will be deleted. Notes, highlights and pen marks on other pages will be kept.
 Show answers
Use the show answers option to reveal answers to your class. You can reveal answers one question at a time or for an exercise.
Note:
The option to reveal answers one at a time is only available for some exercises.
To show the answers, click the Show answers icon in the toolbar, then click the Show answers icon again next to the question or exercise you want to reveal:
Click inside an answer box and its contents will be shown at a larger size at the top of the screen.
 Delete answers
You can change the answer for an exercise at any point by clicking the answer box and choosing a new answer. To delete all of your answers on a page:
1.Click the Delete answers icon.
2.Click OK on the message. All of the answers on the page will be deleted.
 Move toolbar
Use this option to move the toolbar to a different place on screen. The toolbar can be set to the top, bottom, or either side of the screen as shown below:
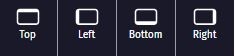
To move the toolbar, click the Move toolbar icon, then click the option you want to use.
Note:
The toolbar will stay in your favourite place - across both web and desktop - and will stay there until you move it again.
 Page view
There are three ways to view coursebooks:
•One page: View one page of the book at a time. To choose one page view, click the Page view icon and then click One page.
•Two page: View two pages of the book side by side. To choose two page view, click the Page view icon and then click Two page.
•Scroll view: View the book at full zoom. Scroll up or down to move through the book. Some functions, such as the Pens and Highlighters are not available when using scroll view. To choose scroll view, click the Page view icon and then click Scroll view.
Note:
The next time you open your Classroom Presentation Tool, it will keep the last page view settings you used.
 Tile view
You can choose to see certain pages of the book.
•All: You'll see all the pages of the book. Click the Tile view icon, then click All.
•Bookmarks: You'll see your bookmarked pages. Click the Tile view icon, then click Bookmarks.
•Notes: You'll see pages of the book you have added audio or text notes to. Click the Tile view icon, then click Notes.
 Switch books
Some courses have two Classroom Presentation Tools: one for the Student's Book or Class Book, and one for the Workbook or Activity Book. Some of these allow you to switch quickly between books to related pages or exercises.
On page links
There are interactive links on relevant pages of the books:
![]()
Click the link to switch to the relevant page of your second book. You can go back to your first book using the Switch book icon in the toolbar.
 Jump to page
Want to jump to a specific page in your book? Select the page number in the toolbar and enter the page number you want to go to. Choose Go or Enter on your keyboard to jump to that page.